FENDER SPEAKER KIT - HONDA ATV'S
What is it?
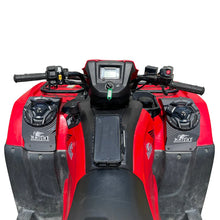
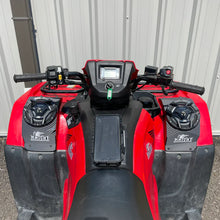
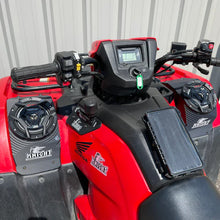
Introducing our new innovative speaker housings for your Honda ATV! Custom sized speaker housings fit perfectly snug on your OEM fender plastics. Sold as a complete speaker kit with all necessary components to install on the vehicle. Or you can purchase the unloaded speaker housings and build your own speaker kit. (These speaker housings fit 6.5" speakers)
Fitment:
- Honda Foreman, Rancher, Rubicon, 2014-2024, 420/500/520
- If your OEM fender plastics start with the numbers below, this kit will fit your vehicle!!
- Front Right Fender 61100...
- Front Left Fender 61200...
Select your kit:
- Unloaded Housings Kit:
- (2) Speaker Housings with waterproof on/off switch
- Mounting Hardware
- You must select NO for the RBG LED lights with this option.
- Waterproof Submergible Complete Speaker Kit:
- (2) Knight ATV KS23 6.5" Marine Speakers, waterproof!
- (1) Marine amplifier (Bluetooth accessible or aux wire ready) fully waterproof and submergible! You can completely submerge this, deep, for a long time, and it will keep working! 2 year warranty!
- Mounting Hardware
- Waterproof on off switch with red LED light
- All necessary wiring to make it plug and play
Unique Features:
- Custom fit. Laser scanned and 3D modeled specifically for Honda ATV fender plastics.
- Full speaker kits comes with all necessary wiring to make it plug and play.
- LED option can always be added later. All speakers now come with the LED's. If you do not select the LED option and want it later you can purchase the controller, remote and wiring separately.
- First, look at the "MP3 Player Parts Bag", these wires are only needed if you are not using Bluetooth from your phone. Disregard them if you are using your phone to control music and volume.
- Place the left speaker housing (the one with the "ON OFF" toggle switch) on the left fender so that it sits flush against the surface, slide it around until you feel it set into its perfect location.
- Drill 4 holes into the fender for the mounting bolts, don't bolt it on yet.
- After that, notice where the wires will be, about center but a little lower than the speaker. Drill a hole near the bottom center of the speaker housing for the wiring harnesses.
- Push all the wires through and then mount the speaker housing to the fender. DO NOT over tighten the bolts to secure the housing to the fender plastic.
- Place the amplifier on the back side of the black fender plastic, keep it away from any heat and moving parts. Make sure the location isn't too far, so the wires all still reach and can be plugged in. You can even plug the wires in at this time and then mount the amp.
- Drill 4 holes and mount the amplifier with the supplied screws and nuts.
- Run the wires for the other speaker (and LED if purchased) to the right speaker. Somewhere along the front of the quad, keep the wires away from moving and hot parts. Wait to secure these with cable ties until after the speakers are fully installed and tested.
- Line up the right speaker housing on the right fender. Drill the same holes as the left side.
- Push the wires from the left side through that center hole and connect the wires to the speaker.
- Bolt the speaker to the fender, DO NOT over tighten the bolts.
- Run the Black and Red wire from the left speaker to your battery, connect the red wire to positive and black wire to negative.
- Turn it on and connect Bluetooth and test LED's (if purchased)
- Fasten all the wiring away from moving and hot parts using cable ties. Use duct tape or silicone to fill in around the holes that the wires come out of.
- Done! Go ride and enjoy!


